
I. What to Expect
🕘 Reading time = 45 minutes
By the end of this document, you’ll understand the process of installing Smile CDR on your Mac operating system. You will also learn how to download and install all necessary auxiliary software required to complete your Smile CDR installation.
II. Background
Smile CDR is an innovative, secure, flexible and fast clinical data repository that enables interoperability within an organization’s health systems. Smile is powered by HAPI-FHIR which is an open source FHIR server that was built to the HL7 FHIR standard. Learn more about HAPI-FHIR here. With Smile CDR, your valuable data is stored in the (open) FHIR format in a database you control—there’s never any vendor lock-in. Smile CDR offers a number of advanced features—from integrated consent and identity services to MDM and FHIR Gateways. In this document, we’ll focus on the absolute basics; installing and using Smile CDR for the first time.
To explore Smile CDR’s rich feature set, please visit our extensive platform documentation. Visit our website to understand how Smile CDR’s modular design can be customized to address various use cases.
III. Objective
The intent of this document is to provide a step-by-step guide to installing Smile CDR on your Mac computer. You should be able to successfully complete the installation with little to no technical background. There are various applications you will need to have installed prior to and after installing Smile CDR. A step-by-step guide to installing these ancillary applications is in the prerequisites and next steps sections of this document.
IV. Prerequisites
Smile CDR can be installed and configured in minutes. It is not necessary to have development experience to install the Smile CDR application, however, the following items are required:
-
A fundamental understanding of how to operate within MacOS (for example, if you are a Mac user, you should be familiar with the Finder application and how to access various folders within your computer). If you are new to either of these operating systems, the following videos will provide an introduction to using MacOS:
-
Mac OS - introduction
-
-
An understanding of your system requirements.
If you're a Mac user, please take note of the following system requirements:
You'll need roughly 1GB of disk space available to install all necessary software.
-
A basic understanding of your terminal (Mac) application. This is what you'll use to accomplish and automate tasks without the use of a graphical user interface. If you would like to educate yourself on these applications, see the following tutorials for Terminal and Command Prompt.
-
As a Mac user, if you are following this document and would like to open your terminal:
-
First click on the Launchpad desktop icon (see below):

-
-
-
-
-
Then, in the search bar at the top, type terminal, and click on the following application:
-
-
V.  Installing Smile CDR: MacOS Installation
For a video tutorial on installing Smile CDR for MacOS, click here.
Note: if you're a Mac user, you are able to install Smile CDR natively. However, you also have the option to install and run Smile from a container environment such as Docker. Should you prefer to do so, an instructional document on installing Docker can be found here.
If you have a 2020 (or newer) Apple Mac computer (which uses the ARM M1 processor as opposed to the Intel x86 processor), it's highly recommended that you follow the instructions outlined in this document, which will guide you through installing the correct Java environment for your computer.
-
Let’s download the most current version of Smile CDR. Navigate to the following URL: https://docker.smilecdr.com/downloads/
-
Once opened, a login prompt will appear, use the following:
-
Username: <<use the one supplied to you by Smile CDR>>
-
Password: <<use the one supplied to you by Smile CDR>>
-
-
Once logged in, the following screen should appear:
-
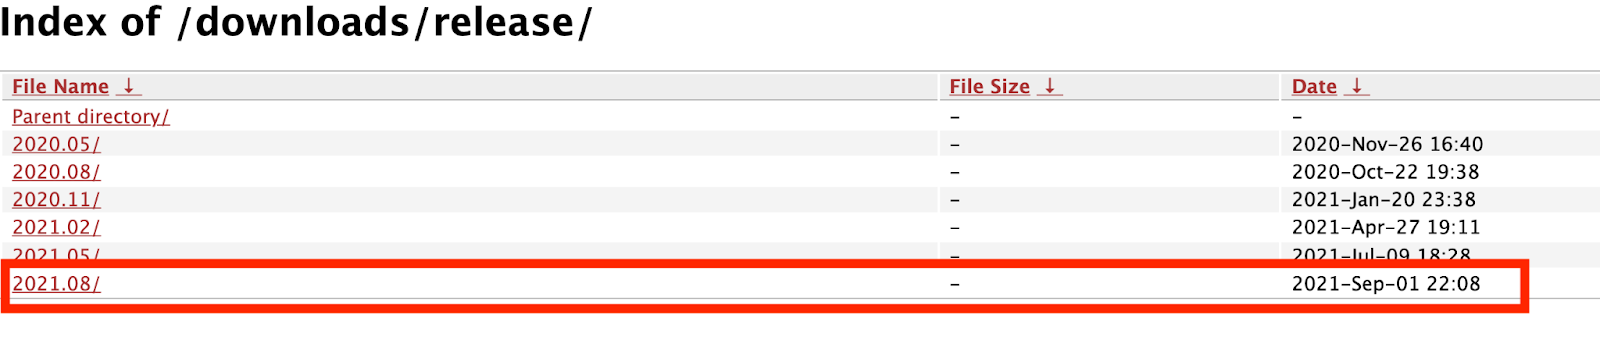
Click release/
-
A list of the most recent Smile CDR releases will appear. We recommend that you select the most recent one, which at the time of this writing is the September 1, 2021 release.
-
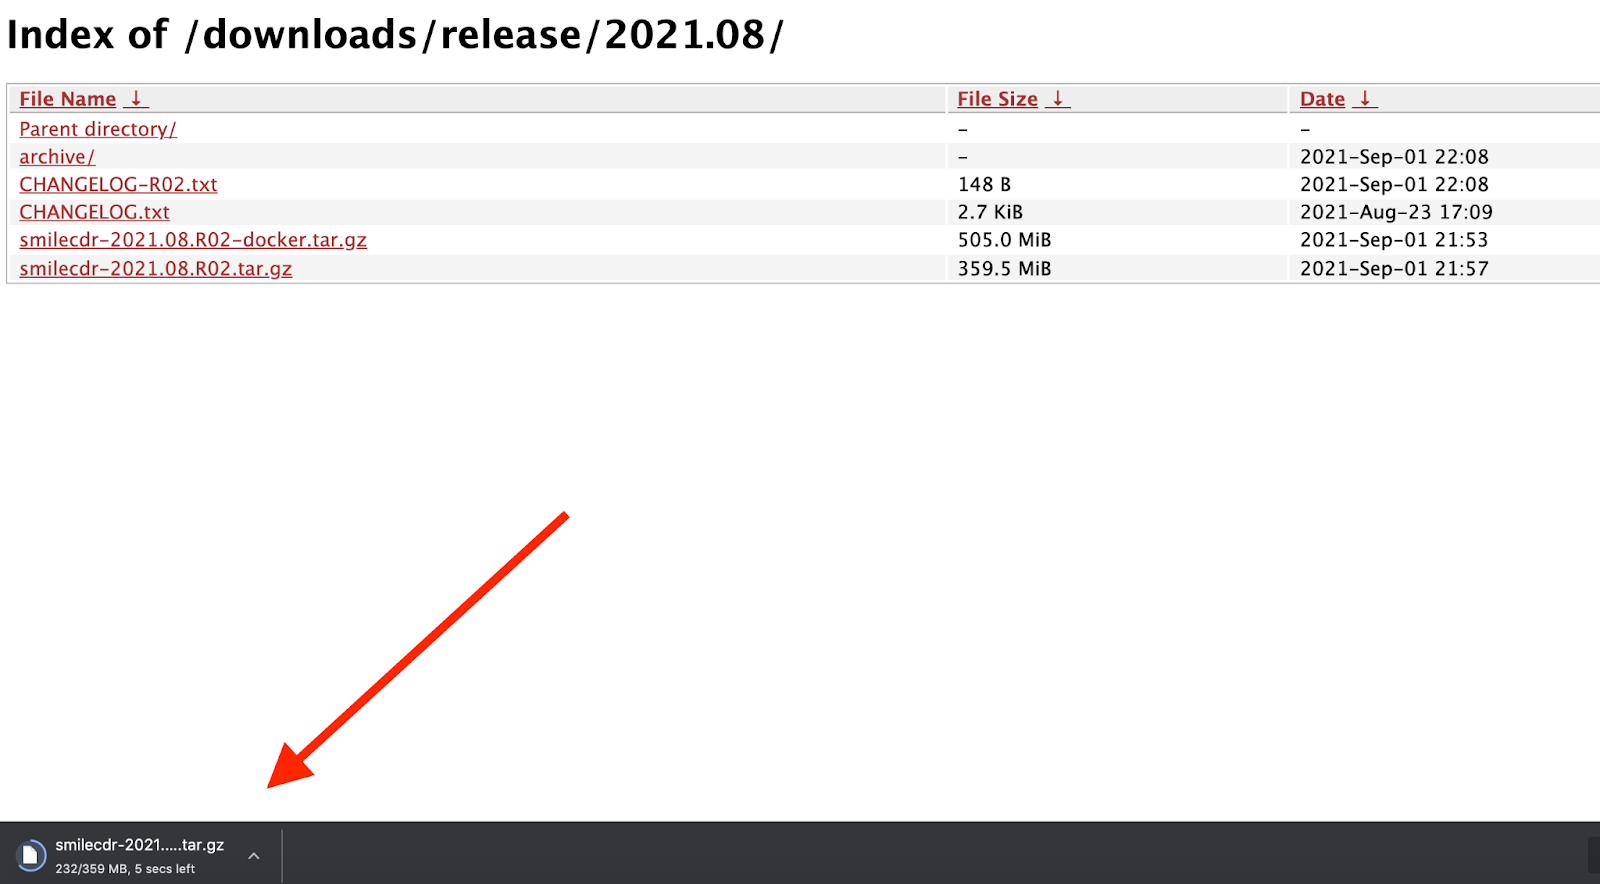
Click on the release that ends with tar.gz (Note: DO NOT select the release that ends with “docker.tar.gz”).
-
Once you have clicked on the correct release, Smile should begin downloading as shown below:
-
When the download is complete, click on it.
-
Your Finder application will launch automatically and will have already selected the “Downloads” folder.
-
In an effort to follow good housekeeping practices on your computer, it’s recommended that you move smilecdr out of your downloads folder and into your system’s local drive. To do this:
-
Open your terminal application. Once open, it should look similar to the below image:
-
Run the following command (copy and paste it into your terminal, then press enter):
sudo mv ~/downloads/smilecdr /usr/local/smilecdr
This will prompt you to enter your computer password. Do so, then press enter.
-
-
-
Now we will access the directory in which we can locate our Smile CDR instance. To do so, run the following command:
cd /usr/local/smilecdr/bin
-
Time to start up our instance of Smile CDR! Lets run the following command:
./smilecdr start
The following should appear:
-
Once you’ve hit enter, Smile CDR will begin running in your terminal. For someone who has never used their terminal before, this might look like hundreds of seemingly random lines of code typing themselves out. Don’t be alarmed!
-
Once Smile has finished starting up, the bottom of your terminal should read: “Smile, we’re up and running! :)”:
-
You’ve now downloaded and started up Smile CDR! To open and log into Smile CDR:
-
Open a new Google Chrome tab.
-
In the search bar, type localhost:9100 and hit enter
-
The following login page should appear:
-
-
Click the green Sign In button and fill out the prompt page with the following information:
-
Username: admin
-
Password: password
-
-
Congratulations, you’re now running Smile CDR! Should you run into trouble, contact your Smile CDR Account Rep.
-
It’s advised that you stop your Smile CDR instance when you shut down your computer. If you want to stop your instance of Smile CDR, run the following command in your terminal:
./smilecdr stop
The shutdown procedures will then begin. As soon as this has completed, your terminal will read “Shutdown has completed” (see below):


VII. Next Steps
Tell us about your experience! Fill out this short survey to let us know if this document helped.
It’s recommended that you take some time to review the following documents to familiarize yourself with topics that will allow you to enhance your knowledge of the Smile CDR application and its capabilities:
-
SMART on FHIR—Useful for developing apps that access protected information with authorization.
-
RESTful API—Useful for understanding FHIR’s RESTful API and how to use it.
-
Channel Import using Kafka—Navigating Smile CDR’s channel import functionality as a means of pushing data between systems in real-time.
VII. Glossary
Command Prompt/Terminal:
This is what people use to accomplish and automate tasks without the use of a graphical user interface.
For example, rather than opening Microsoft Word by clicking on the little desktop app, I can open it from the command terminal by typing in some lines only my computer can really comprehend.